Importing and Exporting Users
The Import and Export functions allow you to configure MAPS quickly by loading a list of usernames from a CSV or XML file. If you are moving users from one server to another, you can export the users and then import them on the new server. If you are creating your list of users based on a previous system, you can set up a file manually or through your previous system, and then import it into MAPS.
File Format
MAPS provides two formats that you can use when importing and exporting users: CSV and XML.
CSV files can easily be edited using spreadsheet programs, and are very human-readable. XML files are specified using Extensible Markup Language, and are commonly used to share data between programs or over the internet. You can view and edit them using a text editor, but they are not as easy to read as CSV files.
If you need to include user role, group, or custom field information in the file, you should use XML format, as the CSV format does not support these options.
When importing from a file, if you do not have data for a particular field it can be left blank and updated later. Some fields, such as the GUID and last logon date, cannot be updated via the import file as they contain system-defined information. Other fields will necessarily be blank, such as the LdapDN for a MAPS user, or CasID if your institution does not use CAS.
CSV
The import file can contain up to 24 available fields, in any order. The first row of the file must contain the headers that identify the fields for each column.
XML
The import file can contain up to 24 tags for each user, plus any number of optional <Role> and <Group> tags. The header information is specified in the XML tags.
Name - The username for this user. One word. Required for new users; may use the GUID field instead or in addition to the Name field when updating existing users.
Description - A short description of this user. Optional. Use double quotes around this field to allow it to contain multiple words.
GUID - A system-created ID that uniquely identifies this user. When importing users, this field can be used to update an existing username since the import function looks for a GUID first. If a matching GUID is found, the username for that GUID will be updated. If the GUID is blank, MAPS will attempt to match existing users based on the Name field instead. This field cannot be updated from the import file, since it is a unique key for each user which cannot be modified.
EmailAddress - The email address of a MAPS user. This field can be left blank for LDAP users, unless you wish to override their LDAP email address.
Priority - The queue priority for queries run by this user. Lowest/Lower/Normal/Higher/Highest. The default of "Normal" will be used if this field is blank or contains an invalid string.
Disabled - A Boolean Yes/No indicating whether or not this user is disabled in MAPS due to entering a bad password multiple times, or the date for final use passing. This field cannot be updated from the import file.
CreatedBy - The name of the user who created this user. This field cannot be updated from the import file. For new users, the CreatedBy user will be the user who is performing the import.
CreatedDate - The date this user was created. This field cannot be updated from the import file. For new users, the CreatedDate will be the date they were imported into MAPS.
ModifiedDate - The date this user was last modified. This field cannot be updated from the import file. For new users, the ModifiedDate will be the date they were imported into MAPS.
LastLogonDate - The date this user last logged in to the system. This field cannot be updated from the import file. This field will be null until the user logs in for the first time.
CasID - The CAS identifier for this user, if your institution uses CAS. Should be blank otherwise.
Notes - Optional field for any internal notes pertaining to this user. Use double quotes around this field to allow it to contain multiple words. The Notes field is only visible to MAPS administrators.
StartDate - Optional date which will be the first date that this user is able to log in. Leave blank to have the user be able to log in immediately. Format: yyyy-mm-dd.
StopDate - Optional last date that this user will be able to log in. Useful when it is known that a given user will be leaving on a specific date, after which they should no longer be allowed to log in. Format: yyyy-mm-dd.
DeleteOnStop - Boolean Yes/No indicating whether the user should be deleted after the StopDate passes. Defaults to "No".
Source - Either "MAPS" or "LDAP". Required for new users.
Password - This field is required when creating a new MAPS user, to set their initial password. You can also use it as an optional field to update passwords for existing MAPS users. (Note: LDAP and CAS passwords cannot be changed through MAPS.) It is highly recommended to set the PasswordMustChange field to "Yes" when entering passwords on behalf of a user. The Password field is blanked out when exporting users from MAPS, but the column is kept as a placeholder.
PasswordMustChange (csv) / MustChange (xml) - Boolean Yes/No indicating whether the user is required to change their password the next time they log in. Only applies to MAPS users. It is highly recommended to set this to "Yes" whenever creating initial passwords for MAPS users. Defaults to "Yes" if left blank for new users.
PasswordNeverExpire (csv) / NeverExpire (xml) - Boolean Yes/No that prevents the user's password from expiring after a period of time, if the password policy would otherwise require periodic password changes.
LdapDN - The DN of this user, if they are an LDAP user. This field should be left blank for MAPS users.
LdapEmailAddressOverride - Boolean Yes/No indicating whether an LDAP user should use the email address specified in MAPS instead of their LDAP email address. This field should be left blank for MAPS users.
LdapLogon - The LDAP name of an LDAP user. This field should be left blank for MAPS users.
LdapServer - The name of the LDAP server, as defined on the LDAP -> Servers screen in MAPS. This field should be left blank for MAPS users.
XML Only
Role - Optional. A user role assigned to this user. Specified as attributes within the tag. For example, <Role Product="Argos" Name="DataBlock Designer"/>. This tag may appear more than once if the user has multiple roles.
Group - Optional. A group that the user is a member of. Specified as attributes within the tag. For example, <Group Name="ArgosUsers"/>. This tag may appear more than once if the user is a member of multiple groups. Note: All users will be a member of the "Everyone" group, even if this group is not specified upon import.
CustomField - Optional. Specifies one of three custom user fields that are available for MAPS users. For example, <CustomField Name="Custom Field 1" Value="my custom data"/>. Note: Custom user fields for LDAP users are specified in the LDAP server configuration.
Import/Export
![]()
The Import button allows you to bring in a CSV or XML file containing a list of usernames. This can save time if you want to create a lot of MAPS users at once.
When importing users, you have the option to add all of the users in the import file to certain MAPS groups, or to assign one or more user roles to them. If you will be importing a large number of users, particularly when using CSV format (since CSV format does not allow you to include group or role information), it may be helpful to create separate import files based on group membership and roles. For example, you could have all of your report viewers in one file, and all of your report writers in another. This would allow you to assign the user roles all at once, instead of needing to go in and assign individual permissions later. You could then choose to import a list of all users who are in the HR department, and assign them to the HR group. If you use the "Update existing users" option, this would assign all users in the new file to the HR group, including any users who had already been added to MAPS from one of the previous import files. This gives you a large amount of flexibility in planning your user configuration, since you can create lists of users and import them as needed to add additional permissions.
If you are importing an XML file that already contains group and role information, you may add additional groups or roles when importing if desired. The specified groups/roles will be given to the users in addition to those specified in the import file.
Click the Import icon at the top of the screen to bring up the Import Users dialog box.
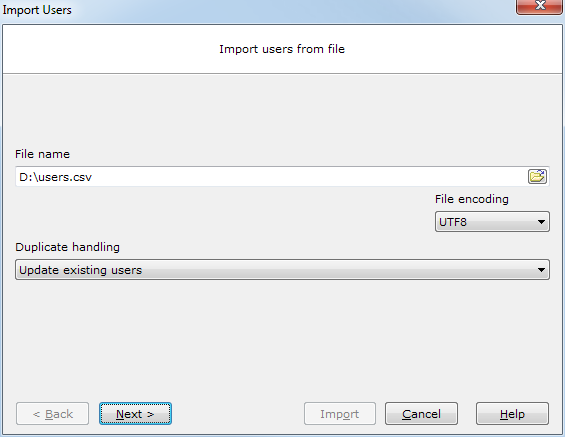
Browse for the file to import. The file encoding defaults to UTF-8, but you can also choose to import an ASCII file.
You can also specify how any duplicate users should be handled:
- Update existing users - any usernames in the file that match existing users will update the information for those users.
- Do not create or update duplicate users - ignores duplicate users without updating them.
- Import duplicate users with a unique name - Appends a number to the end of any usernames that are duplicates, to allow the import to proceed without overwriting any existing users. For example, a duplicate of the user 'jsmith' would become 'jsmith1'.
After clicking Next, you will be able to choose which groups these users should be added as a member of. By default, all users are added to the system group called "Everyone".
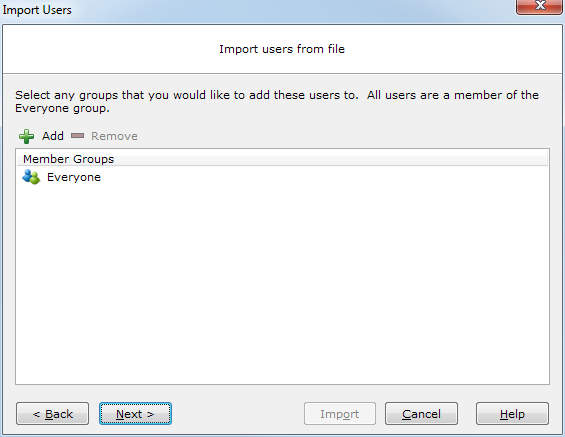
Select the Add button to choose additional groups:
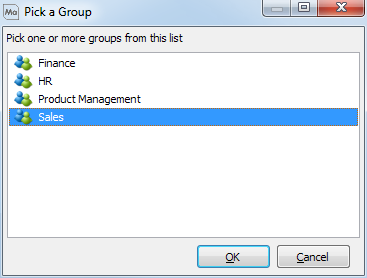
Click Next to proceed.
The last step is to select which user role(s), if any, should be given to these users. User roles in MAPS only apply to MAPS (for MAPS administrators) and Argos (for Report Viewers/Writers, DataBlock Designers, and Argos Admins). Select the Add button if you wish to grant one or more user roles to all of the users in the import file:
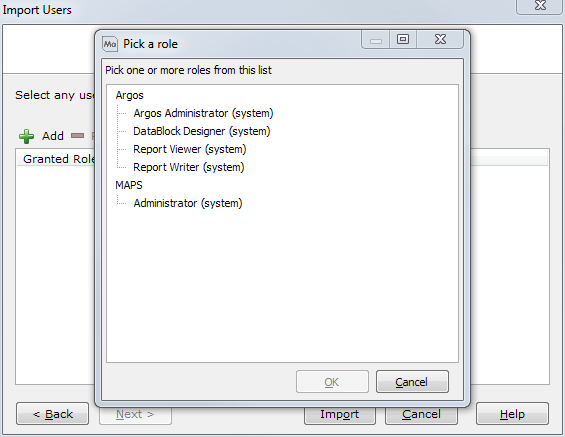
Select the desired user roles, then click OK. Then, click Import to proceed with importing the users.
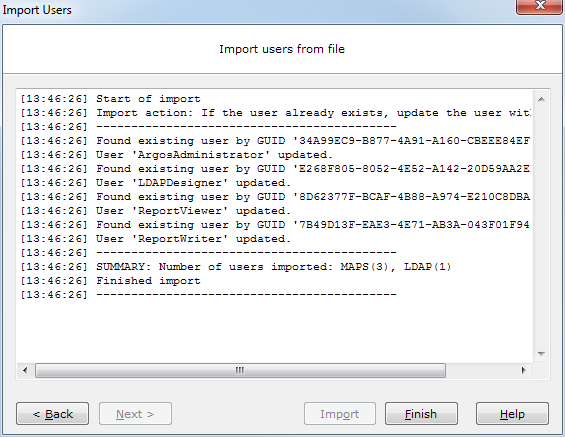
The results of the import operation will appear on the screen. If needed, you can copy this information into a text editor or other program for review.
If you make a mistake during the import process, you can correct any bad information in the import file and then import it again using the update function. If you import users unintentionally, however, you will need to manually delete these users as there is not an "undo" function for the import process.
The Export function can be used to generate a list of users; to copy users from one MAPS server to another; to make batch edits to multiple users at once (by exporting and re-importing); or for any other purpose where you need a list of users and/or their properties in an external file.
To export users to a file, select the Export button at the top of the screen. Then, choose either CSV or XML format.
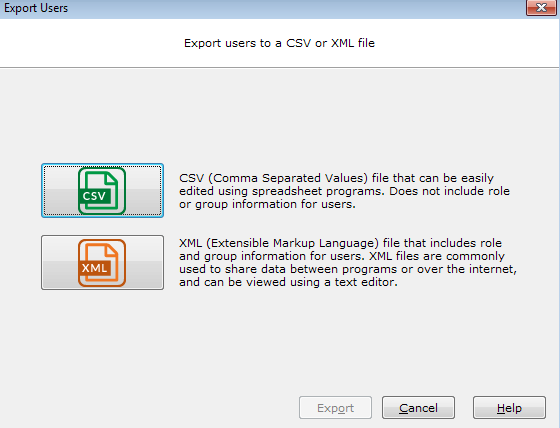
Next, choose which fields you want to include in the export file.
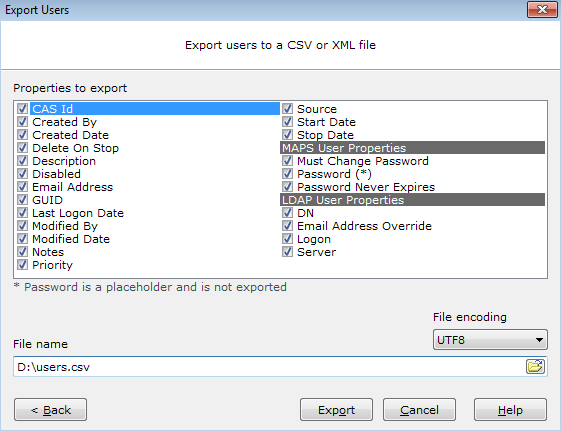
Enter the desired filename and path, then select Export. The export log will appear on the final screen, showing progress and indicating any errors. If desired, you can copy the output to a text editor or other program.
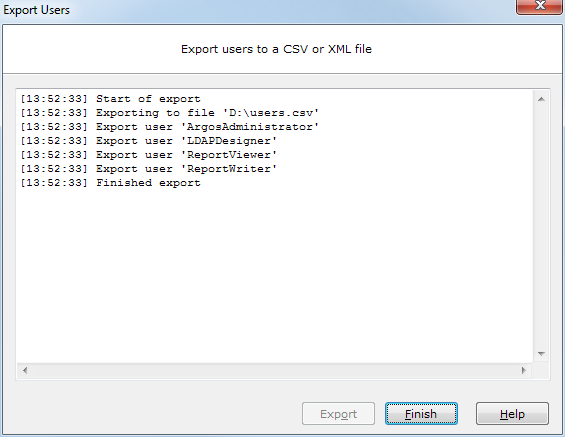
Select Finish when you are done reviewing the log.